
Why Garage Floors Are One of the Easiest Projects to Get Wrong
Why garage floors are one of the easiest home projects to get wrong. Learn the real causes of coating failure, hidden costs, and what homeowners should check before starting.
4/10/20265 min read
Garage floors look simple.
Flat concrete. Maybe a coating. Done.
That’s how most homeowners think about it going in—and that’s exactly why this project goes wrong so often.
It doesn’t look technical. It doesn’t feel like a major renovation. There’s no framing, no wiring, no permits in most cases. So it gets treated like a “quick upgrade.”
Then a few months later, the floor starts peeling, showing stains, or wearing unevenly—and now it’s a redo instead of a project.
Most homeowners don’t realize this until it’s too late: garage floors fail because of what happens before the coating—not after.
Why This Project Gets Underestimated So Often
Garage floors fall into a category that causes problems: they look easy, but they’re not forgiving.
What Most Homeowners Assume
“It’s just paint or coating over concrete.”
“Prep is basic cleaning.”
“This can be done in a weekend.”
Those assumptions aren’t unreasonable—but they leave out the part that actually matters.
What’s Actually Happening
Concrete isn’t a finished surface. It’s a porous material that:
absorbs moisture
traps oils and contaminants
expands and contracts with temperature
settles over time
You’re not decorating it—you’re trying to bond something to it permanently.
That’s a different kind of project entirely.
Why That Difference Matters
If the surface isn’t prepared correctly:
coatings don’t stick properly
imperfections show through
failures don’t happen immediately—they show up later
That delayed failure is what catches people off guard.
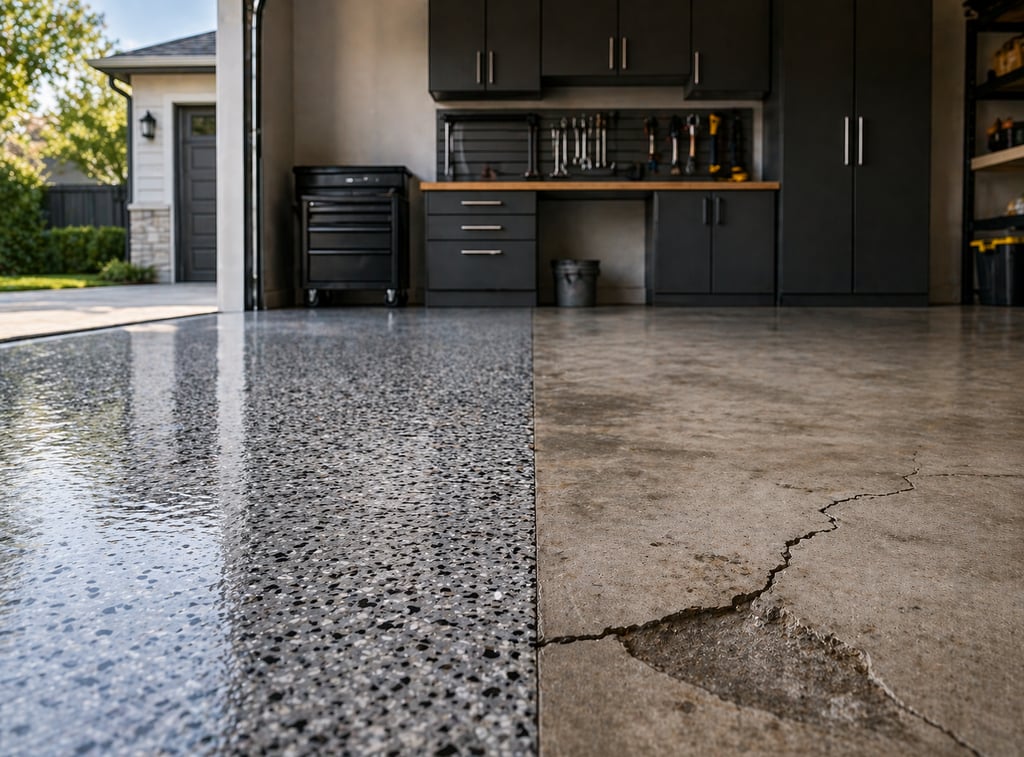
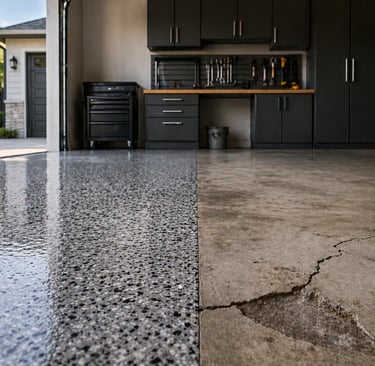
The Concrete Underneath Is Usually the Real Issue
Most homeowners focus on the coating.
Epoxy. Polyaspartic. Sealers.
But the coating is only as good as what’s underneath it.
What Often Gets Missed
Garage slabs aren’t perfect—even in newer homes.
Common issues include:
hairline cracks that widen with seasonal movement
oil stains that soak deep into the surface
uneven curing from when the slab was poured
small low spots that hold moisture
In areas with clay-heavy soil (common in many mid-sized Southern cities), the ground shifts more than expected. That movement can create subtle slab changes over time.
What That Means in Practice
Even if the surface looks fine:
the coating may not bond evenly
cracks can telegraph through
stains can bleed back up
Most homeowners regret focusing on the coating instead of the slab condition.
Prep Work Is Where Projects Actually Succeed or Fail
This is the part that makes or breaks the entire project.
And it’s also the part most people don’t fully understand before starting.
What Proper Prep Looks Like
mechanical grinding (not just cleaning)
repairing cracks and surface damage
removing oil and embedded contaminants
checking and managing moisture
What Gets Skipped in a Lot of Jobs
full surface grinding
deep cleaning beyond the surface
proper drying time
moisture testing
Why?
Because prep is time-consuming. And time is where cost comes from.
The Shortcut That Costs More Later
When prep is rushed:
coatings look fine at first
then start failing within months
This is one of the most common “hidden cost” mistakes—saving upfront, paying later.
Moisture Is the Problem Most People Don’t See Coming
If there’s one thing that causes more failures than anything else, it’s moisture.
And it’s usually invisible.
Where Moisture Comes From
water vapor rising through the slab
humidity in the air (especially in warm climates)
poor drainage around the home
condensation from temperature swings
Even if your garage feels dry, moisture can still be present below the surface.
What Moisture Does Over Time
weakens adhesion
creates bubbles under the coating
leads to peeling and flaking
causes cloudy or uneven finishes
You can do everything else right—but if moisture isn’t addressed, the floor can still fail.
Why This Gets Missed
Most homeowners don’t test for it.
And not every contractor includes it unless it’s specifically discussed.
DIY vs Professional Work: Where the Gap Really Shows
A lot of people try DIY first.
And that makes sense—garage floors don’t seem complicated.
What DIY Gets You
lower upfront cost ($100–$300)
quick visual improvement
basic surface coverage
Where DIY Falls Short
limited prep tools
no grinding equipment
no moisture testing
thinner coatings
inconsistent application
What Usually Happens After a Few Months
peeling in high-traffic areas
lifting where tires sit
uneven wear patterns
At that point, many homeowners end up doing the project again—this time with better prep.
Doing it twice is where this project gets expensive.
The Timeline Most People Misjudge
Garage floor projects don’t just depend on materials—they depend on timing.
What People Expect
one-day project
quick return to normal use
minimal disruption
What Actually Happens
prep alone can take a full day
coatings need cure time
full durability takes several days
Why Rushing Causes Problems
coatings don’t bond properly
moisture gets trapped
defects get sealed in
This is one of those “what contractors won’t tell you unless you ask” situations—timing matters more than speed.
Where Costs Really Come From (And Why Quotes Vary So Much)
This is where a lot of confusion happens.
Two quotes can be far apart—and both can sound reasonable.
What Actually Drives Cost
amount of prep required
condition of the slab
type of coating system
labor time
moisture mitigation (if needed)
Realistic Cost Ranges
DIY approach: $100–$300
basic professional job: $500–$1,500
full prep + durable system: $2,000–$4,000+
What That Price Gap Really Means
The difference usually comes down to:
how thoroughly the surface is prepared
how durable the system is
how long the result is expected to last
The cheaper option often skips steps you won’t notice until later.
What Contractors Don’t Always Spell Out Clearly
Most contractors aren’t trying to mislead—but some details don’t get explained unless you ask.
Red Flags to Watch For
vague prep descriptions (“we clean and coat”)
unclear timelines
no mention of moisture checks
warranties with limitations tied to prep or moisture
Questions That Actually Save You Money
“Are you grinding the surface or just cleaning it?”
“How are cracks handled?”
“Is moisture tested before installation?”
“What exactly does the warranty cover?”
Do this before you call anyone—it’s one of the easiest ways to avoid redoing the job.
Why Some Floors Look Great at First—Then Fail Later
This is one of the most frustrating outcomes.
Everything looks perfect at the start.
Then six months later:
edges start lifting
high-traffic areas wear down
small defects become obvious
Where Failures Usually Start
edges and corners
areas with inconsistent prep
spots exposed to moisture
What It Comes Back To
Almost always:
prep quality
moisture
or rushed installation
When homeowners hit this point, they usually start digging deeper into how coatings are actually applied and why results vary so much. Looking at how different systems are installed in real conditions—like the process outlined in garage floor coating applications in Madison, Alabama—can help explain why some floors hold up and others don’t.
When It’s Worth Hiring Out (And When It’s Not)
Not every garage needs a high-end coating system.
But not every floor should be DIY either.
Worth Hiring Out If:
the slab has cracks or stains
moisture might be an issue
you want long-term durability
you don’t want to redo the project
DIY Might Work If:
the slab is in excellent condition
it’s a low-use space
you’re okay with a shorter lifespan
The Honest Reality
Most homeowners regret underestimating this project—not overdoing it.
What to Check Before You Start
Before choosing materials or getting quotes, start here.
Quick Checklist
inspect for cracks and uneven areas
check for moisture signs
look at drainage around the garage
understand how the space is used daily
confirm prep requirements before committing
Final Takeaway
Garage floors look simple—but they’re not forgiving.
What actually saves money is getting the prep right, managing moisture, and setting realistic expectations from the start.
If you slow down, ask better questions, and don’t skip the steps that matter, you avoid most of the problems that show up later.
The sooner you handle the underlying issues, the less it will cost you down the road.

©2026