
What Property Owners Should Understand Before Clearing a Piece of Land
Learn what property owners should check before clearing land, including boundaries, permits, utilities, drainage, tree removal, stump treatment, contractor quotes, grading, debris disposal, and hidden costs.
6/8/202617 min read
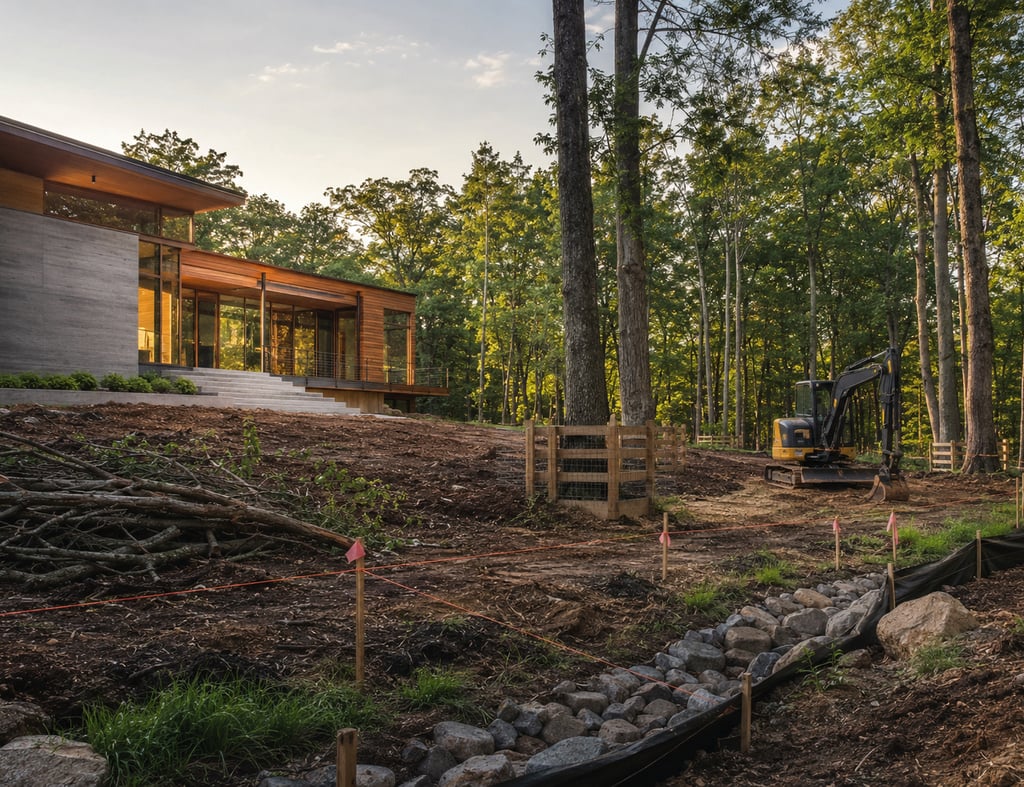
A wooded or overgrown property can look like unused space waiting to become something better.
Remove the trees. Clear the brush. Smooth the ground. Start building.
That sounds straightforward until the equipment arrives and exposes everything the vegetation was hiding: soft soil, buried debris, drainage channels, steep grade changes, old fencing, utility lines, and stumps larger than expected.
Land clearing isn’t simply outdoor demolition. It changes how water moves, how soil holds together, how equipment reaches the site, and what the property will cost to maintain afterward. Poor decisions during this early phase can affect a driveway, foundation, septic system, lawn, or neighboring property years later.
Most property owners don’t regret clearing land they genuinely needed. They regret clearing too much, choosing the wrong method, or failing to define what the contractor was supposed to leave behind.
Before anyone starts cutting, grinding, mulching, or digging, work through the decisions below.
1. Start With the Final Use, Not the Vegetation
The first question isn’t, “How many trees should come down?”
It’s, “What must this land support when the clearing is finished?”
The answer determines nearly everything else. Preparing a narrow walking trail requires less disturbance than preparing a house pad. Clearing pasture calls for a different approach than installing a driveway. A future lawn needs different soil treatment than a gravel equipment yard.
Land may be cleared for:
A house or building addition
A detached garage or workshop
A driveway or access road
A septic system
Utility installation
A fence line
A garden
A pasture
A larger lawn
A drainage improvement
A recreational area
A commercial structure
Each use comes with its own requirements.
A building site may need complete stump excavation, controlled grading, compacted fill, erosion protection, and room for construction vehicles. A garden may benefit from selective clearing that preserves wind protection and healthy topsoil. A fence line may only need enough vegetation removed to allow installation and future maintenance.
Clear for a defined purpose. Don’t remove extra vegetation simply because the machinery is already there.
Make a Basic Site Plan
You don’t need professional construction drawings before speaking with a contractor. A basic sketch can still prevent confusion.
Mark:
Known property lines
Existing buildings
The proposed work area
Driveways and access points
Wells and septic components
Overhead and underground utilities
Ditches, streams, and low areas
Trees you want to preserve
Slopes and retaining walls
Areas that equipment must avoid
Walk the property after heavy rain if possible. Dry ground can hide drainage problems. Wet conditions reveal where water collects, which slopes wash out, and whether a natural channel crosses the proposed work area.
Take photographs. Those records can help you explain the property to contractors and document its condition before work begins.
Plan for Construction Access
The footprint of a future building isn’t the only area that matters.
Construction crews may need space for:
Concrete trucks
Material deliveries
Excavated soil
Temporary dumpsters
Utility trenching
Equipment turning
Portable toilets
Worker parking
A garage might fit comfortably on the proposed site while the concrete truck has no safe way to reach it. A narrow driveway may work for a pickup but not for an excavator or loaded dump truck.
Think through the entire project sequence before deciding where and how much to clear.
Planning access now actually saves money because it reduces the chance of paying for a second round of clearing later.
2. Confirm the Property Lines Before Cutting Anything
An old fence, tree line, creek, or mowing pattern may appear to mark a boundary. None of those features necessarily matches the legal property line.
Previous owners sometimes installed fences where the terrain made construction easier. Neighboring owners may have maintained parts of each other’s land for years. Survey markers can also disappear beneath leaves, soil, and vegetation.
If work will occur near a boundary, locate the recorded survey or hire a licensed surveyor to mark the relevant lines.
Removing a neighbor’s tree can lead to:
Replacement claims
Legal expenses
Project delays
Additional surveying
Required restoration
A damaged relationship with the neighbor
Large, mature trees can carry substantial value. Several mistakenly removed trees may cost far more than confirming the boundary would have.
Check More Than the Outer Boundary
The property line is only one restriction.
Review recorded documents for:
Utility easements
Drainage easements
Shared access rights
Conservation restrictions
Sewer and water corridors
Private road agreements
Homeowners association requirements
You may own the land beneath an easement while still facing limits on planting, excavation, fencing, or construction.
A utility company may need permanent access to part of the property. Filling a drainage easement or placing debris inside it can interfere with stormwater flow and create expensive corrections.
Do this before you call anyone: Gather your deed, survey, subdivision plat, site plan, and available easement records. Make sure the work area doesn’t depend on assumptions.
3. Check Permits and Restrictions Early
Clearing requirements vary by location and project size.
A small rural parcel may face few restrictions. A lot inside city limits, a planned neighborhood, or a growing suburban area may require several approvals before soil is disturbed.
Possible requirements include:
Land-disturbance permits
Grading permits
Tree-removal permits
Erosion-control plans
Stormwater approvals
Driveway or right-of-way permits
Septic approvals
Stream-buffer restrictions
Wetland-related authorization
Homeowners association approval
Conditions tied to a building permit
Some rules focus on the number or size of trees removed. Others apply after a certain area of soil is disturbed. Local governments may also require construction entrances, silt fencing, sediment controls, or inspections.
In fast-growing areas around Huntsville and similar mid-sized cities, a parcel that once felt rural may now sit inside expanding municipal boundaries or development regulations. Don’t rely on what a neighbor did several years ago.
Put Permit Responsibility in Writing
Never assume the contractor will handle permits.
Some land-clearing companies routinely obtain them. Others expect the property owner, builder, engineer, or developer to complete that work.
The written agreement should identify:
Which approvals are required
Who applies for each one
Who pays the fees
Who schedules inspections
Whether work can begin before approval
Who corrects violations or failed inspections
A contractor saying, “We’ve never needed one around here,” isn’t the same as confirmation from the responsible authority.
Why Early Approval Matters
Unauthorized clearing may trigger a stop-work order. You could then need to revise plans, restore disturbed areas, install additional erosion controls, or pay penalties before the project continues.
Equipment may sit idle while those issues are resolved. Contractors may charge for remobilization if they have to remove their machinery and return later.
Permit surprises become much more expensive after the first tree falls.
4. Find Out What Is Below the Surface
Vegetation is only the visible part of the site.
Below the ground may be:
Water and sewer lines
Septic tanks and drain fields
Electrical service
Gas or propane lines
Internet and communication cables
Irrigation piping
Drainage pipes
Old foundations
Abandoned wells or cisterns
Buried fencing
Construction debris
Previous burn pits
Arrange for public utilities to be marked before digging. Remember that the public locating service may only mark facilities owned by participating utility companies.
It may not identify private lines running from the meter to:
A detached garage
A barn or workshop
A well pump
Landscape lighting
An irrigation system
A propane tank
A septic component
A private gate
A private utility locator may be needed if the location of those systems is unknown.
Older Properties Can Hide Expensive Surprises
Rural and older residential parcels sometimes contain buried concrete, roofing material, scrap metal, fence wire, or remains from demolished structures.
These materials can damage equipment or require special disposal. They may also change how long the work takes.
Ask how unforeseen underground material will be priced. Possibilities include:
An hourly equipment rate
A fee per truckload
A written change order
Separate disposal charges
A negotiated allowance in the original quote
The hidden cost isn’t always finding the debris. It’s learning that the original price covered none of the time or hauling required to remove it.
5. Understand Clearing, Grubbing, and Grading
Contractors may use several terms that sound similar but describe different levels of work.
Clearing
Clearing removes above-ground vegetation and visible obstacles. It may include brush, vines, small trees, large trees, fallen limbs, and surface debris.
Grubbing
Grubbing removes stumps, roots, buried organic material, and other obstacles beneath the surface.
Grading
Grading changes the contour or elevation of the ground. It may involve cutting high areas, filling low spots, shaping slopes, and preparing drainage paths.
Finish Grading
Finish grading creates the final surface required for seed, sod, gravel, paving, or another planned use.
A contractor can truthfully say a property has been cleared even if it remains covered with stumps, root balls, holes, ruts, and rough soil.
Ask what the site will look like at completion.
Questions Every Quote Should Answer
Will large trees be felled and removed?
Will small vegetation be mulched, chipped, or hauled?
Will every stump be treated?
Will stumps be ground or excavated?
Will root balls be removed?
Will stump holes be filled?
Is rough grading included?
Is finish grading included?
Will suitable fill be added where needed?
Will equipment ruts be repaired?
Will rocks and surface roots remain?
Will the site be ready for its intended next use?
Two contractors can quote the same acreage while promising completely different results.
Don’t compare clearing prices until you have compared the finished condition.
6. Take Drainage Seriously
Vegetation does more than occupy space.
Leaves soften the impact of rainfall. Roots help hold soil in place. Ground cover slows runoff. Organic material improves the soil’s ability to absorb water.
Clearing changes that system.
After vegetation is removed, water may travel faster and in greater volume. Heavy equipment can also compact the soil, which reduces infiltration and increases surface runoff.
Poorly planned clearing can cause water to:
Pool near a foundation
Cross a proposed driveway
Erode a slope
Wash soil onto a road
Flood a neighboring parcel
Overload a ditch
Expose underground utilities
Carry sediment into a storm drain
Create muddy low spots
This deserves particular attention in areas with humid summers, intense rain, and clay-heavy soil.
North Alabama’s red clay can be hard when dry and slick when saturated. Once machinery compacts it, water may sit on the surface rather than soaking in.
Flat Ground Isn’t Always Better
Property owners sometimes ask a contractor to “make everything level.”
Perfectly level ground often holds water. Most usable sites need controlled slopes that direct runoff away from structures and toward a lawful outlet.
For the first several feet around a building, the ground generally needs to fall away from the foundation. The exact design depends on the site, construction plans, and local requirements.
A complicated property may need input from:
A civil engineer
A drainage specialist
A septic designer
A landscape architect
The building designer
That consultation costs money, but it can prevent years of wet crawl spaces, eroded driveways, and soggy lawns.
Follow the Water to Its Destination
Moving water away from the proposed building doesn’t solve the problem if that water is redirected onto a neighbor.
Before changing the grade, determine:
Where runoff enters the property
Where it naturally collects
Where it currently leaves
Whether an easement controls the route
Whether a ditch or culvert has enough capacity
Whether construction will block an existing path
Water will keep moving after the contractor leaves. Make sure the plan accounts for where it goes next.
7. Decide Which Trees Should Stay
Clear-cutting may be faster, but removing everything isn’t automatically the smartest decision.
Healthy mature trees can provide:
Shade
Privacy
Wind protection
Soil stability
Wildlife habitat
A buffer from nearby roads
Lower summer temperatures around outdoor areas
A large shade tree may take decades to replace. Selective clearing can preserve useful trees while still creating enough room for construction or landscaping.
Before work begins, identify three categories:
Trees that must be removed
Trees that should remain
Trees that require professional evaluation
An arborist can assess high-value trees for decay, structural weakness, disease, poor root conditions, and long-term survival potential.
Preserving a Tree Means Protecting Its Roots
Leaving the trunk untouched isn’t enough.
Roots commonly extend beyond the canopy. Heavy machinery, trenching, stored soil, and repeated traffic can crush or cut those roots. Raising or lowering the soil around a tree may also interfere with air and water movement.
Damage may not appear immediately. A tree can decline slowly and become unstable several years after construction.
To protect trees:
Establish a visible protection zone
Keep machinery outside that zone
Don’t store soil around the trunk
Avoid trenching through major roots
Keep fuel and chemicals away
Limit grade changes near the tree
Prune damaged branches correctly
Monitor the tree after construction
Mark protected trees with more than a strip of ribbon. Temporary fencing creates a clearer boundary and gives equipment operators less room for misunderstanding.
Remove Future Hazards While Access Is Open
A dead, declining, or poorly positioned tree may become more expensive to remove after a house, fence, utility line, or driveway is installed.
Have those trees evaluated while equipment can still reach them easily.
This doesn’t justify unnecessary removal. It means the decision should account for the property’s future layout, not only its current appearance.
8. Choose the Right Stump Treatment
Cutting the trunk is only part of removing a tree.
What happens to the stump depends on how the area will be used.
Stump Grinding
A grinder reduces the stump below the surface and leaves much of the root system underground.
Grinding often works well when:
The area will become lawn
Deep excavation isn’t required
Nearby utilities make digging risky
Minimizing soil disturbance matters
Minor future settlement can be corrected
The ground may settle as the remaining roots decay. Wood chips mixed into the soil can also affect how well grass establishes.
Ask how deep the stump will be ground and whether the resulting hole will be backfilled with chips, soil, or a mixture.
Stump Excavation
An excavator removes the stump and much of the root ball.
Excavation may be more appropriate when:
A building will occupy the area
A driveway will cross the location
Utility installation requires clear soil
Significant grading is already planned
Future settlement must be minimized
Removing a large root ball leaves a large hole. That hole must be filled with suitable material and compacted in layers.
Loose soil dumped into the opening can settle for years. Driving over the top once doesn’t provide dependable compaction.
Leaving the Stump
Leaving low-cut stumps can reduce costs in woodland, low-use, or agricultural areas.
It usually causes trouble in:
Lawns
Paths
Driveways
Building sites
Play areas
Frequently mowed spaces
Future fence lines
A hidden stump can damage mowing equipment or become a trip hazard after grass and weeds cover it.
Match the stump method to the final use, not merely to the lowest initial price.
9. Compare Contractors by Scope, Not by Price Alone
A search for land clearing services near me may produce several companies with different equipment, pricing methods, and definitions of a completed job.
One estimate might include stump excavation, hauling, and rough grading. Another might cover only tree cutting and brush removal.
The second number will look lower because it leaves more work for later.
A useful written quote should identify:
Approximate acreage or work boundaries
Trees and vegetation included
Protected areas
Stump treatment
Root removal
Debris handling
Number of hauling loads included
Rough or finish grading
Fill material
Erosion controls
Access routes
Permit responsibilities
Utility-locating responsibilities
Expected schedule
Additional hourly rates
Change-order procedures
Payment terms
Insurance coverage
Get at least three written estimates based on the same requested result.
Watch for Vague Language
Phrases such as these need clarification:
“Clear as needed”
“Basic grading included”
“Remove most vegetation”
“Stumps priced separately”
“Debris handled on-site”
“Cleanup included”
“Additional work as required”
Ask what each phrase means.
Does “debris handled on-site” mean chipped, piled, burned, or buried? Does “basic grading” include filling stump holes? Are large logs removed while wood chips remain?
The contractor doesn’t need to predict every buried rock. The agreement should still explain the normal scope and how unexpected work will be approved and priced.
Make Sure You’re Comparing the Same Result
Use a simple comparison sheet with one row for each contractor and columns for:
Clearing
Stumps
Hauling
Grading
Fill
Erosion control
Permits
Site repair
Total price
That makes exclusions easier to spot.
A cheaper quote doesn’t actually save money if another crew must finish the job.
10. Know What Drives the Price
There is no single reliable per-acre price for every clearing project.
An open acre covered in light brush has little in common with a steep wooded acre containing large hardwoods, wet ground, utility conflicts, and limited access.
Cost depends on:
Total area
Vegetation density
Tree size
Number of stumps
Terrain
Soil conditions
Equipment access
Debris volume
Disposal distance
Required grading
Fill needs
Erosion controls
Permits
Utility conflicts
Local labor and equipment rates
A small job may cost more per acre because equipment delivery and setup create fixed expenses.
Equipment Access Is a Major Cost Factor
Large machinery needs enough width, overhead clearance, stable ground, and turning room.
Price and scheduling may change when crews encounter:
Narrow gates
Weak driveways
Low branches or wires
Tight corners
Steep slopes
Wet ground
Nearby buildings
Public-road restrictions
Limited space for debris loading
Ask how equipment will enter and leave the property. If machines must cross a lawn or paved driveway, the contract should explain how those surfaces will be protected and repaired.
Weather Can Affect More Than the Schedule
Working on saturated ground can create deep ruts, compact clay, damage access roads, and spread mud onto public streets.
Waiting for drier conditions can actually save money. It may reduce repair work and prevent long-term soil damage.
Ask:
Who decides when the ground is too wet?
Does rain change only the schedule or also the price?
Are mobilization charges added if work stops?
Who repairs weather-related ruts?
A responsible contractor may postpone the job when conditions make good work unlikely.
11. Decide What Will Happen to the Debris
Land clearing produces more material than most property owners expect.
Several mature trees can generate truckloads of logs, limbs, stumps, chips, and tangled roots. Debris handling may represent a substantial part of the estimate.
Common options include:
Hauling material off-site
Chipping limbs
Forestry mulching
Cutting usable logs
Leaving designated wood piles
Burning where permitted
Grinding stumps
Reusing limited material for erosion control
Each method produces a different finished site.
Hauling
Hauling usually creates the cleanest result, but loading, transportation, and disposal add cost.
Confirm:
How many loads are included
How extra loads are priced
Whether stumps cost more to dispose of
Whether soil and concrete count separately
Who pays disposal fees
An estimate based on an uncertain number of loads should include a clear price for additional hauling.
Chipping
Wood chips can work well for paths, erosion control, and planting areas. They also take up substantial space.
Avoid spreading a deep layer where grass needs to grow immediately. Don’t pile chips against siding, tree trunks, or wooden structures.
If you want to keep the chips, identify exactly where the crew should place them.
Forestry Mulching
Forestry mulching grinds vegetation in place and spreads the material across the surface.
It can reduce hauling and disturb less soil than pulling every small tree and root. However, it may not remove large stumps or prepare the site for construction.
Before choosing this method, ask:
What size trees can the machine process?
How high will remaining stumps be?
How deep will the mulch layer become?
Will large logs still need removal?
Can the area be graded afterward?
How soon can grass or other vegetation be established?
The words “forestry mulched” don’t guarantee a smooth, mowable surface.
Burning and Burying
Burning may require permits, notifications, setbacks, appropriate weather, and fire-control measures. Local restrictions can change during drought conditions.
Never assume a rural location makes burning automatically legal.
Burying wood creates another problem. Organic material shrinks as it decays, causing depressions or voids.
Buried debris should never sit beneath:
Foundations
Slabs
Driveways
Retaining walls
Utility routes
Finished landscaped areas where settlement matters
If a contractor proposes an on-site burial pit, find out whether it’s allowed and how that area will be used in the future.
12. Protect the Soil During the Work
The soil is part of the property’s value. Treating it as disposable can create years of repair work.
Heavy machinery can:
Compact soil
Mix topsoil with subsoil
Create ruts
Expose clay
Damage roots
Strip away organic material
Redirect surface water
Compaction is especially troublesome where the cleared area will become a lawn or garden.
Grass seed scattered over hard red clay rarely produces a durable lawn without additional preparation.
The site may need:
Soil loosening
Topsoil
Compost
Finish grading
Seed or sod
Mulch
Temporary watering
Soil testing
Lime or fertilizer based on test results
Save Topsoil When Practical
If significant grading is planned, ask whether usable topsoil can be stripped and stockpiled before deeper soil is moved.
That topsoil can be spread again during final grading. Otherwise, fertile surface soil may become buried while poor subsoil remains on top.
Topsoil piles need protection from erosion and shouldn’t block drainage or sit inside protected tree zones.
Keep Clean Soil Separate From Debris
Root balls, wood chips, construction debris, and good fill shouldn’t all be mixed together.
Clean fill may be useful for shaping the site. Organic debris can settle. Some imported material may contain rocks, trash, weeds, or unsuitable clay.
Ask what kind of fill will be used and where it comes from.
Cheap fill becomes expensive when it settles, drains poorly, or must be removed before construction.
13. Install Erosion Controls Before the First Major Rain
Bare ground can move quickly during a storm.
Eroded soil may enter a ditch, clog a culvert, wash across a driveway, or settle on neighboring land. Local authorities may require the owner to correct the damage.
Temporary controls may include:
Silt fencing
Straw wattles
Erosion-control blankets
Mulch
Sediment traps
Rock construction entrances
Temporary swales
Diversion berms
Fast-growing ground cover
The correct method depends on the slope, soil, drainage pattern, disturbed area, and local requirements.
Don’t Wait Until the Project Is Finished
Erosion controls should protect the property while clearing and grading are underway, not only after the machines leave.
A sudden storm can wash away freshly disturbed soil overnight.
Inspect controls after heavy rain. A collapsed silt fence or clogged channel can stop working when it’s needed most.
Stabilize the Site Quickly
Have the next step scheduled before clearing begins.
Depending on the project, stabilization may mean:
Starting construction
Installing gravel
Applying seed and straw
Laying sod
Spreading mulch
Installing an erosion blanket
Planting temporary cover
Clearing is only one phase. Bare ground isn’t a finished result.
14. Be Realistic About DIY Clearing
Removing small brush with hand tools is reasonable for many property owners.
Operating heavy machinery around slopes, utilities, buildings, and large trees is a different job.
DIY work may make sense when:
The area is limited
Vegetation is light
No large trees are involved
The terrain is relatively flat
Boundaries are clearly marked
Utilities have been located
Debris can be handled legally
You understand the equipment
Hiring the work out is usually safer when the project involves:
Large tree removal
Dead or leaning trees
Steep slopes
Excavation near utilities
Large stump removal
Major grade changes
Work beside a public road
Soft or unstable soil
Large burn piles
Nearby homes or power lines
Rental Costs Add Up Quickly
The advertised daily equipment rate rarely represents the full cost.
You may also pay for:
Delivery and pickup
Fuel
Damage protection
Attachments
Additional days
Trailer rental
Debris disposal
Cleanup
Repairs to damaged surfaces
The wrong-sized machine can turn a one-day professional job into an exhausting weekend with little progress.
Skip This Mistake: Learning Tree Felling Near a House
Large trees don’t always fall as expected.
Dead limbs can drop before the trunk moves. Leaning trees may contain internal tension. A trunk can split, twist, or strike another tree during the fall.
Tree work near houses, vehicles, power lines, roads, and neighboring property is generally worth hiring out.
Saving on labor doesn’t help if the project damages a roof, utility line, or vehicle.
15. Check the Contractor, Not Just the Machinery
A large excavator doesn’t guarantee careful work.
Before hiring, verify:
The company’s legal business name
Current contact information
General liability insurance
Workers’ compensation coverage when applicable
Required licenses or registrations
Experience with similar properties
Who will operate the equipment
Whether subcontractors will participate
How damage claims are handled
Recent references
A written contract
Ask for an insurance certificate. A screenshot of an old policy isn’t enough.
Ask Specific Questions
General questions produce general answers. Ask:
How will you protect the trees that remain?
What happens if you damage a private utility?
How will you prevent runoff?
Where will debris go?
What work could trigger a change order?
Who repairs the access route?
What condition will the ground be in when you finish?
How do you handle unexpected buried material?
When is final payment due?
The answers should be clear enough to include in the contract.
Red Flags Worth Taking Seriously
Be cautious if a contractor:
Requests full payment before work begins
Refuses to provide a written scope
Dismisses utility marking
Claims permits never apply
Can’t explain debris disposal
Pressures you to sign immediately
Ignores drainage
Won’t identify protected trees
Gives an unusually low lump-sum price
Suggests burying debris without discussing future settlement
Won’t provide proof of insurance
A deposit may be reasonable when equipment mobilization is required. Full payment before meaningful work begins creates unnecessary risk.
Tie payments to clear milestones.
16. Control Changes While the Work Is Happening
Land-clearing projects often change once vegetation is removed.
You may discover:
More stumps than expected
An old foundation
Buried trash
Soft ground
A hidden drainage channel
A larger slope
A failing culvert
A tree that can’t safely remain
That doesn’t mean every change is suspicious. It means the contract needs a process for handling them.
Require written approval before additional work begins. The change order should describe:
What was discovered
Why the original plan must change
The additional cost
Any schedule impact
The revised finished condition
Avoid agreeing to several verbal additions during a noisy workday. Small requests can accumulate into a large final bill.
Keep photographs and basic notes as the project progresses.
17. Inspect the Site Before the Equipment Leaves
Don’t wait until after final payment to walk the property.
Heavy equipment costs money to bring back. Corrections are easier while the machines remain on-site.
Check:
The correct area was cleared
Protected vegetation remains intact
Agreed stumps were treated
Holes were filled
Debris was handled properly
Rough grading matches the plan
Drainage routes remain open
Access areas were repaired
Fences and driveways weren’t damaged
Erosion controls are in place
The property is reasonably safe to walk
Take photographs before work, during major stages, and at completion.
Inspect After Rain When Possible
A dry site can look properly graded while still holding water during the next storm.
If the schedule allows, observe the property after rainfall before accepting final drainage work. Look for:
Ponding
New channels
Soil washing
Water moving toward buildings
Sediment leaving the site
Overflowing ditches
Soft access areas
Not every puddle signals a serious failure, but repeated standing water deserves attention.
Expect Limited Settlement
Areas where large stumps were removed may settle as the fill consolidates.
Ask whether the contractor includes a return visit or correction period. If not, expect minor touch-up work after the site has experienced several rains.
Settlement beneath a building or paved surface is more serious. Those areas need suitable fill and controlled compaction from the beginning.
18. Plan the Next Phase Before Clearing Starts
A newly cleared property doesn’t remain clear without follow-up.
If the site sits unused:
Weeds return
Invasive plants spread
Soil erodes
Ruts hold water
Loose mulch shifts
Brush regrows
Neighbors may complain about unfinished conditions
Determine what will happen immediately after clearing.
The sequence may include:
Construction staking
Utility installation
Foundation excavation
Driveway construction
Drainage work
Rough grading
Final utility connections
Finish grading
Topsoil placement
Seed, sod, or planting
Fence installation
Coordinate those phases carefully.
There’s little value in finish grading before utility crews dig trenches across the site. Installing grass too early can lead to paying for the same lawn twice.
The better approach is to give each contractor a clear understanding of what comes before and after their work.
Quick Checklist Before Clearing Land
Before signing a contract, confirm the following:
The final use of the land is clearly defined
Property boundaries have been confirmed
Easements and restrictions have been reviewed
Required permits have been identified
Public utilities will be marked
Private utilities have been located when necessary
Trees to remain are clearly protected
Stump treatment is specified
Debris disposal is explained
Hauling limits and extra-load costs are written down
Rough and finish grading are clearly distinguished
Fill type and compaction requirements are identified
Drainage has been considered
Erosion controls are included
Equipment access is planned
Repair responsibility is documented
Change-order procedures are clear
Insurance has been verified
Payment is tied to defined milestones
The next phase is ready to begin
If several of these details remain vague, the project isn’t ready for machinery.
The Bottom Line
Good land clearing isn’t about removing as much vegetation as possible. It’s about preparing the right amount of land for a specific use without creating new problems.
Confirm the boundaries. Review permits and easements. Locate utilities. Decide which trees should remain. Choose stump treatments based on future construction. Plan how water will move. Compare written quotes using the same scope, and settle debris, grading, and erosion-control responsibilities before work starts.
Most land-clearing regrets begin with an undefined finished result.
Clear only what the project requires, know where the water will go, and put every responsibility in writing. The sooner you handle those decisions, the less the property is likely to cost you down the road.


©2026