The Plumbing Problems Homeowners Usually Notice Later Than They Should
Learn which plumbing problems homeowners often notice too late, from hidden leaks and slow drains to water-heater trouble, sewer backups, pressure changes, and aging pipes.
6/12/202617 min read
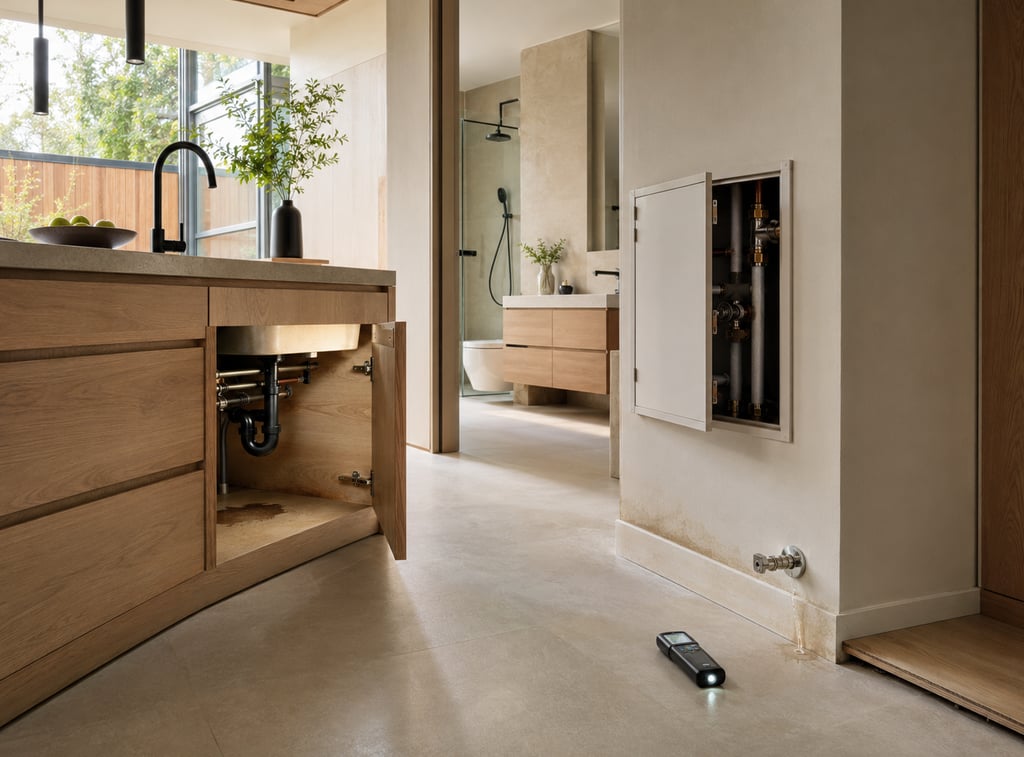
Plumbing problems rarely begin with water pouring through the ceiling.
Most start quietly.
A faucet keeps dripping after you tighten the handle. A toilet runs for a few minutes after every flush. The kitchen sink drains slowly, but only when it’s full. Water pressure drops whenever the washing machine starts. A faint yellow stain appears beneath an upstairs bathroom.
Each symptom seems too small to justify calling anyone. Then a pipe fails, a drain backs up, or the water bill jumps by $80.
That’s what makes plumbing trouble expensive. The first warning is usually easy to ignore. The eventual repair is not.
You don’t need to panic over every strange sound or damp spot. You do need to know which symptoms deserve attention, what you can safely check yourself, and when waiting could increase the damage.
Here’s what homeowners often miss until a minor plumbing problem becomes a larger one.
1. A Faucet That Never Completely Stops Dripping
A dripping faucet feels like a small annoyance. Close the bathroom door, and you may not even hear it.
The problem is that the faucet wastes water around the clock. A persistent drip can also stain the sink, leave mineral deposits, and wear out internal parts.
Common causes include:
A worn washer
A damaged O-ring
A failing cartridge
Corroded valve components
Mineral buildup
Excessive water pressure
An incorrectly installed replacement part
A basic faucet repair may cost relatively little when the correct part is available. The hidden cost appears when water reaches the countertop, cabinet, wall, or flooring.
Check the Shutoff Valves First
Before attempting a repair, locate the hot and cold shutoff valves beneath the sink.
Turn them carefully. If either valve is stuck, heavily corroded, or begins leaking around the stem, stop.
An old multi-turn valve can fail when disturbed after years of sitting in one position. That can turn a small faucet repair into an uncontrolled leak.
A plumber may recommend replacing an unreliable valve with a quarter-turn shutoff. That adds to the immediate cost, but it makes future fixture repairs safer.
Don’t Ignore Moisture Around the Faucet Base
Water dripping from the spout is obvious. Water leaking around the faucet base is easier to miss.
That moisture can enter:
Countertop seams
Cabinet material
Drywall
Flooring
The wall behind the sink
Dry the entire area and avoid using the faucet for several minutes. If moisture reappears, inspect the faucet body, supply lines, mounting area, and connections.
A faucet repair usually costs less than replacing a swollen cabinet or damaged countertop. Fix the source before the surrounding materials begin to fail.
2. A Toilet That Runs After the Tank Should Be Full
A toilet doesn’t need to overflow to waste a surprising amount of water.
If it continues running, refills by itself, or makes a faint hissing sound, water is probably escaping from the tank into the bowl.
Possible causes include:
A worn flapper
An incorrectly adjusted chain
A fill valve that won’t close
A float set too high
Mineral buildup
A damaged flush-valve seal
Water entering the overflow tube
Remove the tank lid and watch a complete flush cycle. The flapper should lift, return to its seat, and seal. The tank should refill and stop.
You can also add a few drops of food coloring to the tank without flushing. Wait 15 to 20 minutes. If colored water appears in the bowl, the tank is leaking internally.
“Universal” Parts Aren’t Always Universal
Toilet-repair kits are inexpensive, but a universal part doesn’t always fit correctly.
The wrong flapper may close too quickly, stay partly open, or fail to seal. Newer toilets may use model-specific canisters, towers, or gaskets.
Before buying anything:
Find the manufacturer and model number.
Photograph the parts inside the tank.
Measure the flush-valve opening if necessary.
Check the manufacturer’s replacement specifications.
Inspect the shutoff valve before starting.
Replacing a flapper is manageable for many homeowners. Working around corroded bolts, brittle plastic fittings, or a leaking shutoff valve takes more care.
Watch for Movement at the Base
A toilet that rocks or shifts deserves prompt attention.
Loose mounting bolts may be responsible, but don’t tighten them aggressively. Porcelain can crack.
Movement may also indicate:
A damaged flange
An uneven floor
A failed wax seal
Loose mounting hardware
Water-damaged subflooring
Possible warning signs include odor near the floor, staining around the base, loose tile, soft flooring, or water appearing after a flush.
Skip this mistake: Don’t caulk around the entire toilet base to hide an active leak. Repair the connection first.
3. Slow Drains That Keep Returning
A slow drain is easy to tolerate. Most homeowners keep using it until the water stops moving entirely.
A one-time slowdown may come from buildup near the opening. A recurring problem usually points to a larger restriction.
Common causes include:
Hair
Soap residue
Grease
Food particles
Mineral deposits
Foreign objects
Pipe scale
Tree roots
A sagging drainpipe
A partial main-line blockage
Pay attention to how many fixtures are affected.
If one bathroom sink drains slowly, the clog may sit close to that fixture. If several drains slow down together, the obstruction may be deeper in the system.
What You Can Safely Try
For a minor fixture clog, you may be able to:
Remove and clean the stopper
Pull visible hair from the drain
Use a cup plunger
Clean an accessible P-trap
Use a small hand-operated drain snake
Put a bucket beneath the trap before loosening it. Photograph the connections first so you know how the washers and fittings fit together.
If the pipes are corroded, fragile, or difficult to reach, forcing a fitting could create a leak.
Be Careful With Chemical Drain Cleaners
Chemical products promise an easy fix. They can also:
Damage certain plumbing materials
Harm older metal pipes
Remain inside a completely blocked drain
Splash during later disassembly
Produce dangerous fumes when mixed
Make professional drain cleaning more hazardous
Never mix drain products. Don’t combine them with bleach, ammonia, or other household chemicals.
If a drain keeps clogging after plunging or snaking, another bottle probably won’t correct the underlying problem.
Recurrence Is the Important Clue
A drain that needs attention every few weeks may indicate:
Poor pipe slope
Heavy buildup
A damaged pipe
Roots inside a sewer line
A blockage farther downstream
An object lodged in the system
One slow fixture may have a local clog. Several slow fixtures can indicate a system-wide problem.
4. Low Water Pressure That Gradually Feels Normal
People adjust to low water pressure.
Showers take longer. The kitchen faucet feels weak. The hose no longer reaches as far. Eventually, poor performance starts to seem normal.
Low pressure can result from:
A clogged aerator
Mineral buildup in a showerhead
A partially closed valve
A failing pressure regulator
Corroded galvanized pipe
A hidden leak
A municipal supply issue
Undersized plumbing
A damaged service line
A well-system problem
First determine whether the issue affects one fixture or the entire house.
When One Fixture Has Low Pressure
Remove and inspect the aerator or showerhead.
Sediment often enters these parts after water-main work, a water-heater repair, or a temporary service interruption. Cleaning the screen or soaking removable components in vinegar may restore flow.
If both hot and cold flow remain weak, the restriction may be in the fixture or its supply lines. If only the hot side is affected, look toward the hot-water valve, supply line, or heater.
When the Whole House Has Low Pressure
Check whether the main shutoff is fully open. If the home has a pressure-reducing valve, that component may also need attention.
Sudden pressure loss across the house can signal a service-line leak. Look for:
Wet or unusually soft soil
Water near the meter
A sudden usage increase
Lower pressure at every fixture
Discolored water
Running-water sounds when everything is off
A pressure gauge attached to an outdoor hose connection can give you a useful reading. Don’t adjust a regulator blindly. Excessive pressure damages fixtures, appliance connections, and supply hoses.
When pressure changes suddenly throughout the house, check for a leak before treating it as a minor inconvenience.
5. High Water Pressure That Feels Like a Benefit
Strong water pressure can make a shower feel better, so homeowners rarely consider it a warning sign.
However, excessive pressure stresses nearly every pressurized component in the house.
It can contribute to:
Dripping faucets
Running toilets
Failed appliance hoses
Noisy pipes
Worn fixture cartridges
Water-heater valve discharge
Premature pipe and fitting failure
Possible signs include frequent fixture repairs, unusually forceful flow, banging pipes, and supply lines that fail earlier than expected.
Pressure May Change During the Day
Municipal pressure can vary by neighborhood and time. One reading won’t always tell the whole story.
A gauge with a maximum-reading indicator can record the highest pressure reached over several hours.
If the house has a pressure-reducing valve and readings remain high, the regulator may be failing or incorrectly adjusted.
Heated Water Needs Room to Expand
A check valve or pressure regulator can create a closed plumbing system. When water heats, it expands. An expansion tank provides room for that extra volume.
A missing, waterlogged, undersized, or incorrectly pressurized expansion tank may contribute to pressure swings and relief-valve discharge.
Never plug a water heater’s temperature-and-pressure relief pipe. That valve is a safety device. Water from the pipe may indicate excessive pressure, excessive temperature, or valve failure.
What feels like excellent pressure may be shortening the life of your plumbing.
6. Small Leaks Hidden Beneath Sinks
Sink cabinets hold enough cleaning supplies and miscellaneous items to conceal a slow leak for months.
Common sources include:
Loose drain connections
Cracked drain components
Leaking faucet supply lines
Corroded shutoff valves
A failed disposal seal
Water entering around the sink rim
Dishwasher hose connections
Condensation
Empty the cabinet and dry everything. Then test one source at a time.
Run cold water, hot water, a full basin, the garbage disposal, and the dishwasher. Touch a dry paper towel to each connection. Even a small amount of water will show.
Moisture Doesn’t Stay in One Place
A slow leak may damage:
Particleboard cabinets
Flooring
Subflooring
Drywall
Trim
Nearby metal components
It can also create odors and conditions that support mold or insects.
Humid summers in North Alabama can slow drying inside a closed cabinet. That gives the damage more time to spread.
An inexpensive water alarm beneath a sink, beside the washing machine, or near the water heater can provide early warning.
Inspect Flexible Supply Lines
Faucet and toilet supply lines have limited service lives.
Look for:
Fraying
Rust
Bulges
Kinks
Corroded fittings
Cracked plastic nuts
Moisture at either end
Replacing a questionable supply line during a planned repair is inexpensive compared with cleaning up after it bursts while the house is empty.
Do this before you call anyone: Empty the cabinet, dry it, and determine whether water appears during supply, drainage, or appliance operation.
7. Water Stains With No Obvious Source
A ceiling stain doesn’t always sit directly beneath a leak.
Water can travel along pipes, framing, insulation, or drywall before it becomes visible. Guessing based only on the stain’s position can send you toward the wrong room.
Possible sources include:
A supply-pipe leak
A drain connection
A toilet seal
A shower valve
Failed tub or shower caulk
A roof leak
HVAC condensation
A washing-machine connection
Pay attention to timing.
Does the stain darken after a shower, toilet flush, rainstorm, or long air-conditioning cycle? The pattern can help separate plumbing trouble from roof or HVAC problems.
Don’t Paint Over the Evidence
Stain-blocking primer can hide discoloration. It can’t stop moisture.
Use the correct order:
Identify the source.
Stop the water.
Let the cavity dry.
Remove damaged material when necessary.
Confirm the moisture doesn’t return.
Prime and repaint.
Repeatedly covering a stain only delays the repair.
Sagging Drywall Can Fall
Waterlogged drywall becomes heavy and weak.
If a ceiling bulges, sags, or feels soft, move people and belongings away. Shut off the water if an active plumbing leak is likely.
Don’t stand beneath the damaged area and puncture it casually. Trapped water may release suddenly, and wet material can collapse.
A stain is evidence. Repair what caused it before repairing the surface.
8. Sewer Odors That Come and Go
A sewer smell isn’t something to cover with air freshener.
Plumbing systems use water-filled traps and vent pipes to keep sewer gases outside the living area. An odor suggests that one of those protections isn’t working.
Common causes include:
A dry P-trap
A failed toilet seal
A blocked or damaged vent
A cracked drainpipe
A faulty air-admittance valve
Buildup inside a drain
A sewer-line defect
Start with fixtures that haven’t been used recently.
A guest shower, utility sink, or floor drain can lose its trap seal through evaporation. Add water and monitor whether the odor returns.
Check the Toilet
A toilet may flush normally even when its base seal has failed.
Odor near the floor, movement in the bowl, or moisture around the base can indicate a flange or seal problem.
Resetting a toilet involves more than installing a new wax ring. The flange needs to sit securely at the correct height. Damaged flooring may also require repair.
Floor Drains Need Water Too
Some floor drains use trap primers that automatically add water. If the primer fails, the trap can dry out.
Other drains require occasional manual filling during long periods of nonuse.
If adding water doesn’t solve the odor, the drainage and venting system may need inspection.
An odor may be intermittent even when the defect is permanent.
9. Plumbing Noises That Suddenly Appear
Some plumbing noise is normal. Water moves through drains, heaters expand, and toilets refill.
New, loud, or repeated noises deserve attention.
Listen for:
Banging
Hammering
Whistling
Hissing
Gurgling
Rattling
Bubbling
Unexplained dripping
Banging When Water Stops
A sharp bang after a washing machine, dishwasher, or faucet valve closes may be water hammer.
Fast-moving water stops suddenly and sends a pressure wave through the pipe. Loose piping can make the sound worse.
Possible corrections include:
Securing loose pipes
Reducing excessive pressure
Installing or replacing hammer arrestors
Correcting undersized plumbing
Repairing failed pressure controls
Don’t assume a random arrestor will solve every banging pipe. High pressure or inadequate support may be responsible.
Whistling and Hissing
These sounds may come from:
A partly closed valve
A restricted supply line
A failing toilet fill valve
A worn pressure regulator
Mineral buildup
Excessive water velocity
A constant hiss near a toilet often means the fill valve is passing water or the tank is leaking into the bowl.
Gurgling Drains
Gurgling may indicate that air can’t move through the drainage system correctly.
Possible causes include a partial clog, blocked vent, poor drain configuration, or developing main-line blockage.
If a toilet gurgles when the washer drains, or one fixture bubbles when another runs, the issue probably extends beyond a single drain.
Noise matters most when it’s new, affects several fixtures, or happens every time a particular appliance runs.
10. A Water Bill That Rises Without Explanation
A higher bill may come from irrigation, guests, seasonal use, or a rate change. It may also be the first sign of a concealed leak.
Common sources include:
Running toilets
Dripping faucets
Irrigation leaks
Underground service-line leaks
Water-softener malfunctions
Water-heater connections
Outdoor faucets
Automatic pool-fill systems
Compare water usage, not just the dollar amount. A rate increase can raise the bill even when consumption remains unchanged.
Perform a Basic Meter Test
To check for unexplained use:
Turn off every faucet and water-using appliance.
Wait for all toilets to finish filling.
Record the meter reading.
Don’t use water for 30 to 60 minutes.
Check the reading again.
Movement suggests that water is passing through the system.
Digital meters may show real-time flow or leak alerts. Learn how your meter displays usage before drawing a conclusion.
If unexplained flow continues and you can’t locate the source, experienced local plumbers can help determine whether it involves a fixture, irrigation connection, buried service line, slab piping, or another concealed component.
The bill may be the first visible symptom of an invisible leak. Don’t wait for damaged flooring or drywall to confirm it.
11. Water-Heater Problems That Develop Slowly
Water heaters usually decline in stages.
Water takes longer to heat. Showers don’t stay warm. The tank begins popping. Corrosion appears near a fitting. Because hot water still comes out, the warning signs get ignored.
Watch for:
Inconsistent temperature
Reduced hot-water capacity
Discolored hot water
Popping or rumbling
Moisture near the base
Corrosion around connections
Relief-valve discharge
Ignition trouble
Repeated breaker trips
An older unit with no maintenance history
Sediment Can Affect Performance
Sediment may accumulate at the bottom of a storage tank.
As the burner or heating element operates, water trapped beneath the buildup can bubble and produce popping sounds. Heavy sediment may reduce capacity and efficiency.
Flushing helps some heaters, but disturbing an old, corroded tank that has never been maintained isn’t always a good idea. Have the unit’s condition evaluated before treating flushing as routine.
Find the Source of Rust or Moisture
Water around the heater may come from:
A loose connection
Condensation
A leaking valve
A corroded fitting
The storage tank
A nearby drain or HVAC line
A leaking storage tank generally needs replacement. It can’t be reliably patched like an exposed pipe.
Know How to Shut It Down
Every homeowner should know:
Where the cold-water shutoff is
Which breaker or disconnect serves the heater
Where the gas shutoff is, if applicable
Where the relief pipe ends
Whether a drain pan is installed
Where the pan drains
Gas, combustion, relief-valve, and high-voltage repairs are worth hiring out.
Knowing how to stop water entering a failed heater can prevent hundreds or thousands of dollars in additional damage.
12. Outdoor Faucets After Freezing Weather
Huntsville doesn’t experience the same winters as northern cities, but occasional freezes still damage unprotected plumbing.
A faucet may look normal after thawing even when the pipe has split inside the wall.
When you later use it, water can enter the wall, crawl space, or basement.
Watch for:
Reduced flow
Damp interior surfaces
A faucet that won’t close
A cracked vacuum breaker
Water appearing inside the wall
Movement where the pipe enters the house
Ask one person to watch the interior area while another opens the faucet outside.
Disconnect Hoses Before Winter
A connected hose can trap water inside a frost-resistant faucet and prevent it from draining properly.
Before freezing weather:
Disconnect garden hoses
Drain outdoor accessories
Close interior isolation valves where installed
Drain exposed lines
Insulate vulnerable piping
Secure crawl-space doors
Follow winterizing instructions for irrigation systems
Foam covers may help, but they can’t correct inadequate insulation or protect every exposed pipe.
Check the Crawl Space
Look for missing insulation, open access doors, previous freeze repairs, gaps near pipe penetrations, and plumbing placed near exterior walls.
Don’t use an unattended space heater beneath the house. The fire risk can outweigh the plumbing benefit.
13. Washing-Machine Hoses That Look Fine Until They Fail
Washing-machine supply hoses remain under pressure even when the appliance isn’t running.
A failed hose can release water quickly, especially if nobody is nearby to close the valve.
Inspect for:
Bulges
Cracks
Rusted fittings
Abrasion
Kinks
Moisture
Deteriorated rubber
Tight bends behind the appliance
Don’t wait for visible failure when the hoses are old or their age is unknown. Follow the appliance and hose manufacturers’ replacement guidance.
Leave Enough Room Behind the Washer
Pushing the machine too close to the wall can crush the drain hose or kink the supply lines.
The drain hose also needs proper support. If it sits too loosely, it can jump out of the standpipe. If it extends too far down, it may contribute to siphoning or drainage issues.
Leak Protection Can Actually Save Money
A water alarm is inexpensive. Automatic shutoff devices cost more but may limit damage, especially when the laundry room sits above a finished floor.
A drain pan also helps, but only if it has a functional drain and enough capacity for the likely leak.
The washing machine may last for years. Don’t assume the hoses behind it will last just as long.
14. Main Sewer-Line Problems Mistaken for Ordinary Clogs
A main sewer problem affects more than one fixture.
Early signs may include:
Several slow drains
Gurgling toilets
Water backing into a tub
Repeated clogs
Sewer odor
Overflow at a cleanout
Wet areas outdoors
Problems that worsen after heavy rain
The lowest drain in the house often shows trouble first.
Running the washing machine may cause water to appear in a shower. Flushing an upstairs toilet may create bubbling downstairs.
Roots Aren’t the Only Cause
Tree roots can enter cracked sewer pipes, but main-line problems can also result from:
Grease buildup
Improperly flushed materials
Collapsed pipe
Corroded cast iron
Separated joints
Poor slope
Soil movement
Construction damage
A sag in the line
Clearing the obstruction restores flow. It doesn’t necessarily repair the defect that caused the blockage.
If the problem returns, a sewer camera can help identify cracks, roots, offsets, standing water, or collapse.
Stop Using Water During a Backup
If sewage enters a tub, shower, or floor drain, stop using the plumbing.
Don’t keep flushing toilets to see whether the line clears. Every gallon entering the system may worsen the overflow.
Keep children and pets away. Contaminated porous materials may require professional cleaning or removal.
Repeated main-line clogs aren’t normal maintenance. They show that the underlying cause remains.
15. Aging Pipes That Haven’t Failed Yet
Old plumbing doesn’t automatically need replacement. Material, installation quality, water chemistry, pressure, and maintenance all affect service life.
However, older houses may contain materials that deserve closer inspection, including:
Galvanized steel
Cast-iron drains
Copper with deteriorated joints
Polybutylene
Older plastic systems
Mixed materials from several renovations
Potential warning signs include:
Rust-colored water
Frequent pinhole leaks
Reduced pressure
Visible corrosion
Flaking or swollen pipe surfaces
Repeated drain backups
Numerous repair couplings
Incompatible metal connections
Repeated Repairs Change the Math
Repairing one isolated leak may be reasonable. Repairing another section every few months suggests broader deterioration.
Keep a record of:
Where each failure occurred
Which material failed
The repair cost
Damage to surrounding finishes
Whether high pressure contributed
How much wall or floor access was needed
Eventually, planned replacement may cost less than repeated emergency repairs.
Ask What the Quote Excludes
A repiping estimate should explain:
Which pipes will be replaced
Which pipes will remain
The new material
Required permits and inspections
Wall and ceiling access
Fixture reconnections
Insulation
Cleanup
Warranty coverage
Drywall, tile, cabinet, and paint repair
The plumbing contractor may not repair every opened wall or damaged finish. That isn’t necessarily a red flag, but the division of responsibility needs to be clear.
The hidden cost of repiping is often access and finish restoration, not just the pipe.
16. Shutoff Valves Nobody Has Tested in Years
A shutoff valve matters most when water is already escaping.
Unfortunately, many homeowners discover that a valve is stuck, hidden, mislabeled, or leaking only after a supply line fails.
Locate shutoffs for:
The entire house
Toilets
Sinks
Washing machine
Dishwasher
Refrigerator
Water heater
Outdoor faucets
Irrigation system
Make sure responsible household members know how to reach the main house valve.
Test Old Valves Carefully
Don’t force a corroded valve.
An old multi-turn shutoff may begin leaking when operated after years in one position. If it looks unreliable, replace it during a planned appointment instead of discovering the problem during an emergency.
Label valves when their purpose isn’t obvious.
Know Which Valve Belongs to the Utility
The valve near the water meter may require a special tool or belong to the utility. Local rules may limit who can operate it.
The house should have an accessible main shutoff that the homeowner can safely use. If it doesn’t, installing one is a practical upgrade.
A working shutoff can turn a major flood into a manageable cleanup.
17. DIY Repairs That Create the Next Problem
Many small plumbing repairs are reasonable for a careful homeowner.
Trouble begins when a temporary patch becomes permanent or the project expands beyond the person’s tools and experience.
Common mistakes include:
Overtightening fittings
Using the wrong thread sealant
Mixing incompatible materials
Installing incorrect supply lines
Using too much chemical drain cleaner
Failing to support new piping
Covering leaks with caulk
Closing walls before testing
Ignoring permit requirements
Reversing hot and cold connections
Know When the Work Is Worth Hiring Out
Professional help usually makes sense for:
Gas piping
Sewage backups
Buried water lines
Slab leaks
Major repiping
Water-heater safety components
Structural water damage
Complex venting
Repeated concealed leaks
Work requiring permits or inspections
Replacing a visible fixture part is one thing. Opening several walls while guessing where a leak begins is another.
Test Every Repair
After completing a repair:
Restore water slowly.
Dry each connection.
Test under normal flow.
Fill and drain the fixture when appropriate.
Check joints with a dry paper towel.
Recheck after several minutes.
Inspect again later that day.
Don’t close a wall or reinstall a cabinet panel until the connection has remained dry.
A repair isn’t finished when the water comes back on. It’s finished after the connection passes a careful leak test.
What Contractors Won’t Always Tell You About Plumbing Quotes
Price matters, but it isn’t the only part of a plumbing estimate worth comparing.
Two quotes may describe very different work.
Before approving a larger repair, ask whether the price includes:
Diagnostic time
Labor
Parts and materials
Permit fees
Inspection fees
Wall or floor access
Removal of old materials
Cleanup
Disposal
Drywall or tile repair
Appliance reconnection
Testing
Warranty coverage
After-hours charges
Get the scope in writing.
A low estimate may exclude wall repair, cleanup, permits, or replacement of nearby deteriorated components. A higher estimate may include those items.
Also ask how change orders work. If hidden damage appears after a wall opens, the contractor should explain what changed, why additional work is necessary, and how much it will cost before proceeding.
Be Careful With Automatic Upselling
Not every old fixture needs replacement. Not every isolated leak requires a complete repipe.
Ask the contractor to separate:
The repair needed now
Work recommended soon
Optional upgrades
Long-term replacement planning
A qualified professional should be able to explain the urgency of each item without relying on pressure tactics.
For substantial work, get up to three written estimates with comparable scopes. The cheapest number isn’t useful when it leaves out half the job.
A Monthly Plumbing Check That Takes About 15 Minutes
You don’t need to inspect every pipe in the house. A short monthly walk-through can catch many developing problems.
Check these areas:
Listen for toilets that continue running
Look beneath every sink
Inspect around toilet bases
Check exposed supply lines
Look for new wall or ceiling stains
Examine the water heater for rust or moisture
Notice pressure changes
Pay attention to recurring clogs
Inspect outdoor faucets
Review unusual water usage
Listen for water when fixtures are off
Test leak alarms
Keep the main shutoff accessible
Every few months, inspect washing-machine hoses, refrigerator connections, guest bathrooms, and rarely used drains.
Take another look after a freeze, heavy storm, renovation, or utility interruption. These events can expose weak components or move sediment through the system.
When a Plumbing Problem Is an Emergency
Some symptoms can wait for a scheduled appointment. Others require immediate action.
Seek urgent help for:
A burst or actively leaking pipe
Sewage entering the house
Water near electrical equipment
A ceiling sagging from water
A water heater leaking heavily
A suspected gas leak
A failed service line
Rapid flooding
Split frozen pipes
No reliable way to shut off escaping water
If you smell gas, leave the property and follow the gas utility’s emergency instructions. Don’t operate switches, use flames, or remain inside while trying to locate the source.
For an active water leak, close the nearest reliable shutoff or the main house valve if you can do so safely. Move belongings away from the area and photograph visible damage.
Don’t delay emergency action while trying to identify the exact fitting that failed.
Quick Checklist: Handle These Before They Become Expensive
Pay attention when you notice:
A toilet refilling without being flushed
A faucet that won’t stop dripping
Several slow drains
Recurring clogs
A sudden pressure change
A higher water bill
Moisture beneath a sink
A new wall or ceiling stain
A rocking toilet
Sewer odor
Gurgling or banging pipes
Rust or water near the heater
Aging appliance hoses
Outdoor-faucet trouble after a freeze
A shutoff valve that won’t operate
For larger repairs:
Get a written scope
Ask what the estimate excludes
Verify permits when required
Clarify responsibility for wall and floor repairs
Require approval before added work
Keep photographs and receipts
Test the completed repair before closing access areas
The Bottom Line
Most expensive plumbing problems don’t begin as emergencies.
They start as a slow drain, running toilet, faint odor, small stain, unusual noise, or bill that seems slightly too high. Those symptoms are easy to tolerate until water reaches the flooring, cabinets, drywall, or framing.
Pay attention to changes. Know where the main shutoff is. Keep sink cabinets clear enough to inspect. Replace questionable supply hoses. Treat recurring clogs as evidence rather than routine inconvenience. Get written estimates when the repair becomes more complicated than replacing a basic fixture part.
Most importantly, don’t let a temporary workaround become part of the house.
The sooner you handle a small plumbing symptom, the less likely you are to pay for damaged finishes, emergency labor, and a much larger repair down the road.


©2026